Let's now create a new circuit drawing from scratch:
FileThe previous schematic will dissappear and a clean sheet will be presented.New
Enter the circuit shown in Figure 7.
To do this,
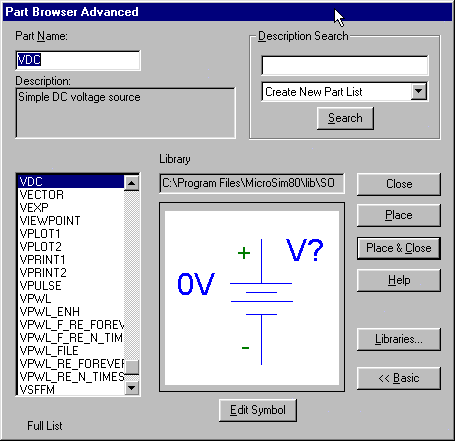
bring up the Part Browser,
Figure 8.
An alphanumeric list is provided, and when Advanced
is selected, a picture of the part is shown.
Scroll down this list and click on some parts
to get an idea of what is available.
Using the Part Browser, place the required parts: VDC, R (you will need two resistors), and GND-ANALOG. Close the Part Browser.
Using the cursor, move the parts to the desired locations on the page. You can rotate parts as needed:
click on part
Edit
Now wire the parts together:
DrawMake sure that all connections are properly made, and you don't accidently make short circuits or run wire through parts. Each wire segment should be clicked at the beginning and end. Click the right mouse button to quit the wiring mode.
You can enter the part values as described earlier using the Set Attribute Value or PartName dialog boxes.
Now save the schematic:
File
type in the filename you want to use
press Save
The circuit is now complete and can be simulated.
Exercise. Compare the PSPICE results with your
theoretical calculations for the voltage across the 10 k![]() resistor.
resistor.
ANU Engineering - ENGN2211