Using the Proof Editor Help

The proof editor is a tool which helps you to create natural deduction proofs of the kind found in these notes. It does not prove sequents for you—you have to decide which inferences to make and provide the details—but it does check your proof step by step as you type it, and it gives you feedback on any errors. This is many times more efficient than handing in solutions to exercises and reacting to feedback from a lecturer or tutor: for one thing, the time between work and feedback is on the order of milliseconds rather than hours, days or weeks; for another, the comments are always accurate and never judgmental. The tool is always available and infinitely patient. Finally, it runs in your own browser, not on a web server anywhere else, and it keeps no record of your activity, so privacy is not an issue.
Using the proof editor is fairly straightforward, if you have read the notes on natural deduction and have at least tried inventing proofs and writing them out on paper. The menus and other controls are generally self-explanatory, but it may still be worth reading through this short guide at least to clarify the details. As usual, the best way to learn is to practice, so try it for yourself and come back to this guide as a reference document.
Starting the proof editor
The proof editor starts automatically when you link to it.
Point any browser at
html://users.cecs.anu.edu.au/~jks/LogicNotes/proof_editor.html
You will be prompted to enter a sequent to be
proved, unless one was already specified as part of the
URL, as happens when you follow a link to the tool from
inside the Logic Notes.
Defining a sequent
If you see two boxes labelled "Premise" and "Conclusion", you are being asked to specify the sequent to be proved. Type the first premise in its box (see Typing a formula below). Remenber to end with RETURN. Repeat for each premise. Then type the conclusion formula in its box. As each formula is added, it will appear in the proof box (the yellow box at the top of the page). When the action menu appears, you are ready to begin constructing the proof.
Things are slightly different if you want to prove the sequent in a non-classical logic.
Before typing the premises and conclusion, you may want to choose what quantifier rules are to be available. Selecting "none" from the drop-down menu limits the proof to propositional logic; "standard" allows the usual unrestricted quantifiers; "restricted" also gives you the binary, restricted ones, and "free logic" requires the rules ALLIf, ALLEf, SOMEIf and SOMEEf in place of their standard counterparts. Independently of the choice of quantifier rules, you may opt to make identity (=) available, with the rules =I and =E, or to leave it out. By default, identity will be turned off for propositional logic.
Adding a proof line
To extend the proof, select "next proof line" from the drop-down action menu. The line construction box will appear. Type the formula which is to appear on the new line. Remember to hit 'Return' to finish the formula. You will be prompted for the source line numbers. Type them, separated by spaces or commas, putting in the numbers of any discharged assumptions in square brackets as required. Then select the rule name from the drop-down list, and finally list the assumptions in the text box to the left. Just typing the numbers will suffice, even if the display is using a Greek 'α' with subscripts, though you may also type 'a2', for instance, to represent 'α2'.
Adding a goal
To set a new sub-goal, select "create goal" from the drop-down action menu. The line construction box will appear. Type the formula which is to be derived. Remember to hit 'Return' to finish the formula. You will be prompted for assumptions on which it is to depend, in the text box to the left. Type them as you would when adding a proof line. Note that the assumptions must already have been added to the proof before you can create a goal depending on them. The annotation section of the goal line is left blank, as it cannot be specified yet. If a line matching the goal (same formula, same assumptions or a subset of them) is later added to the proof, the goal is achieved, and it disappears in favour of the newly added line.
Editing a goal
To add the annotation to a goal, select "edit goal" from the drop-down action menu. The line construction box will appear. Type the source line numbers, with discharges if any, and select the rule name. Goals may refer to other goals as well as to actual proof lines. If the source lines of a goal are all in the proof, the goal is achieved and will automatically be re-written as a line of the proof. This may cause other goals to be achieved in the same way, in which case more than one goal may be incorporated into the proof.
Typing a formula
Text may be typed or copy-pasted into the "formula" text area in the line construction box. Letters such as 'p' or 'F' are typed as normal, as are parentheses and the identity symbol '='. Symbols for connectives or quantifiers may be selected by clicking the appropriate buttons. They may also be input as text using the same conventions as Logic for Fun. That is, you may type 'AND', 'OR', 'NOT', 'IMP', 'BAD', 'ALL' and 'SOME' in place of 'AND', 'OR', 'NOT', 'IMP', 'BAD', 'ALL' and 'SOME'. Note these have to be in upper case. To terminate the formula, hit the 'Return' or 'Enter' key, or click on another part of the line such as the line numbers.
Generally, parentheses are required around any sub-formula with a binary main operator (including '='). If they are omitted, association to the left will be assumed unless a preference to the contrary has been set. Unary operators (including 'NOT' and quantifiers) have minimal scope, so if they are applied to a sub-formula with a binary main operator, parentheses will be required. Function and predicate symbols, variables and names are all single letters, so they may be written as a sequence without spaces or as a comma-separated list in parentheses. That is, 'Rafab' is the same as 'Raf(a,b)' and also the same as 'R(a,f(a,b))'. Use whatever variant of the notation you find most convenient.
Letters have specific uses:
| a…e | names (individual constants); | |
| f…h | function symbols; | |
| F…H | monadic predicate symbols; | |
| p…t | propositional (sentential) atoms; | |
| P…T | relation symbols; | |
| v…z | variables. |
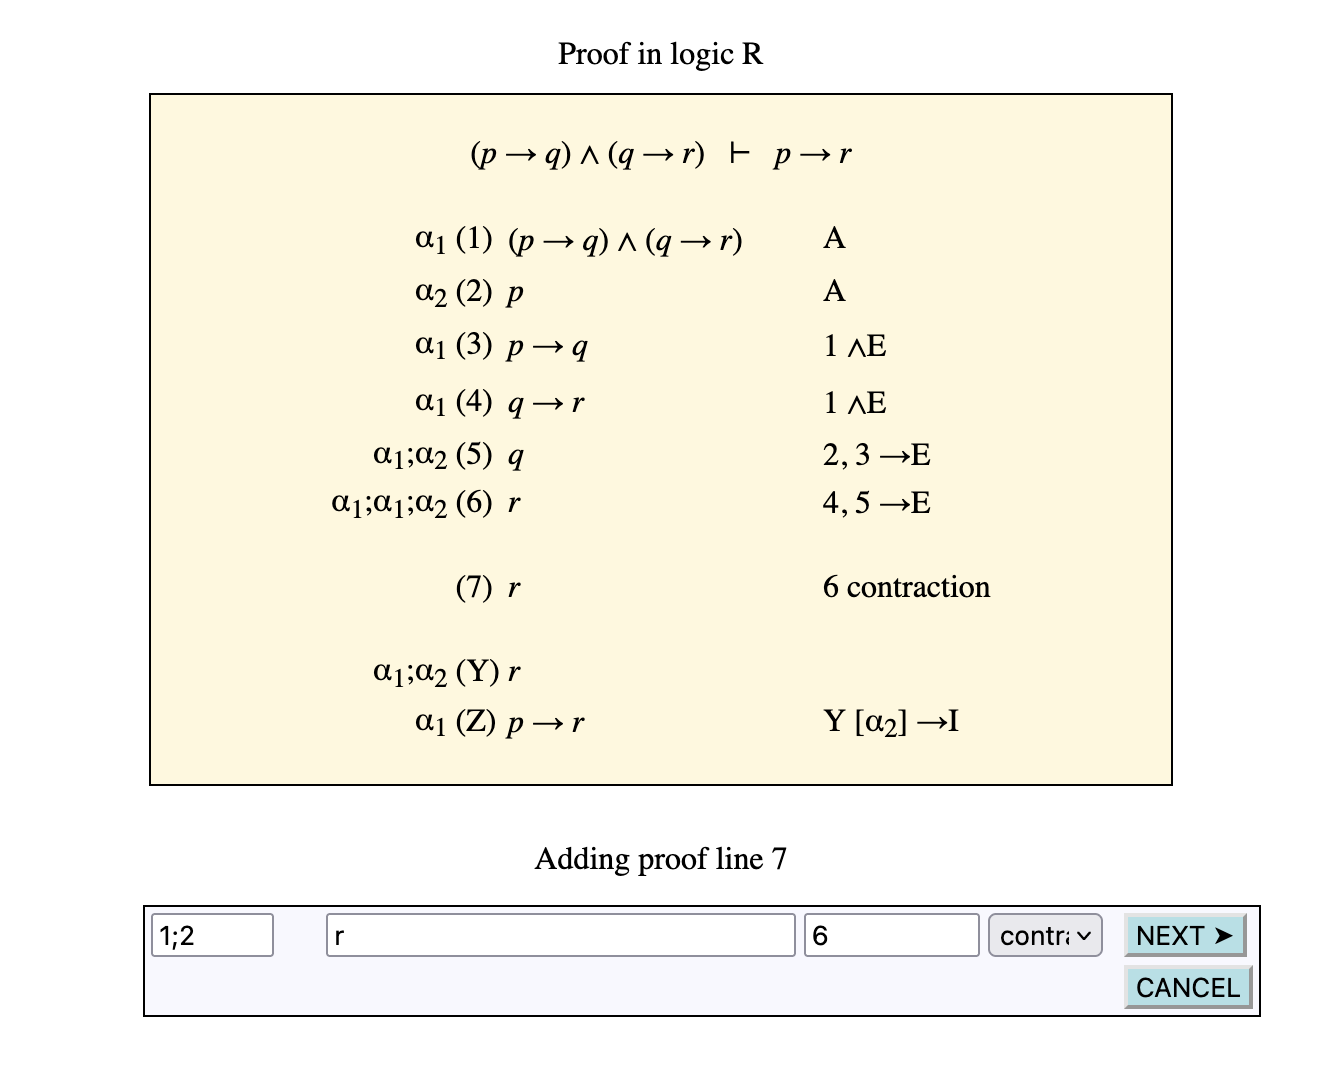
The proof display

The proof under construction is displayed in the main yellow box. At the top is the sequent to be proved. The lines of proof so far are then presented in the linear format due to John Lemmon: to the right of the line number is the formula, and to the left is a list of the assumptions on which it depends. On the extreme right of each line is some annotation saying which source lines it (immediately) follows from and by which rule of inference.
Below the partial proof are the goals, each consisting of a formula to be derived and the assumptions on which it is to depend. Some goals may be annotated as following from other goals. Goals are given letters from the end of the alphabet in place of line numbers. The last goal, always goal "Z", represents the sequent noted at the top. When it is achieved, the proof is done. Consruction of the proof consists in adding lines to the upper section or goals to the lower section, playing both ends against the middle until the gap between them is closed.
The line construction box

When a line is being added to the proof, or a goal is being created or edited, its parts are shown in the horizontal grey box below the proof. The four parts of the line—assumptions, formula, source line numbers (with any discharges) and rule name—are separate items in the line construction box, so that they may be separately edited. As each line part is added, it appears in its position in the proof display.
The action menu
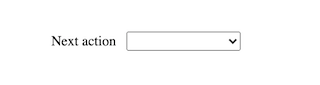
The main process of using the proof editor consists of choosing actions from the Action menu and executing them until the proof is finished. Lines of the proof may be added or deleted, but there is no way to go back and edit lines, other than to delete the succeeding lines.
There are six available actions:
- Add assumption
- Special case of add proof line, where the rule used is A. Only the formula need be typed in the line construction box, as the rest will be filled in automatically.
- Add proof line
- Extend the proof by adding the next line. Every proof can be constructed using just this action if desired.
- Create goal
- Goals appear at the bottom of the proof box, with letters from the end of the alphabet in place of line numbers. Decomposing the problem by creating sub-goals helps to provide structure and generally simplifies the problem.
- Edit goal
- Add the source lines and rule name to annotate a goal, indicating how it is derived. You will be prompted to specify which goal to edit, unless goal Z is the only one.
- Delete proof line
- Remove the last line from the proof so far constructed. References to this line as a source for any goal will also disappear. If the line is an assumption, any goal which depends on it will be removed as well. Initial assumptions cannot be removed, so if there are no proof lines other than the premises of the target sequent, this action has no effect.
- Delete goal
- Similar to deleting a proof line, but any goal except Z can be selected for deletion. If the deleted goal is not the one most recently added, other goals may be re-numbered as a result.
Error messages
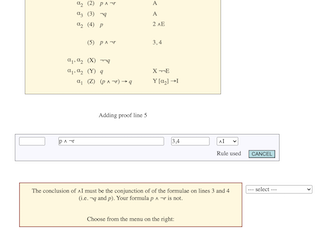
As each line segment is added, it is checked for syntactic well-formedness and conformity with the rules of the calculus. If any error is detected, a message appears in a a box at the bottom of the window. To proceed when you get an error message, do as it says and select from the menu to the right.
Before doing that, it is important to make sure you understand what the proof editor is complaining about: why is it an error? The 'Help' option is provided as a starting point in case there is any obscurity: usually it points to a the page of the glossary detailing the rule you claim to be applying, though occasionally it may reference some other part of the Logic Notes.
The usual response to an error message is to edit the line segment you are currently adding. For instance, if you have just selected the rule and you take this option, you will re-write the annotation (line numbers and rule) without changing the rest of the line under construction. You also have the option to go further back and re-write the entire line, normally starting with the formula, or more radically to skip out of the current action altogether and return to the Action menu. This last is equivalent to clicking the 'Cancel' button of the line construction box.
The error messages are quite brief, and sometimes a bit technical (as you woud expect, given that they come from checking the technicalities) but they are intended to be helpful rather than critical. We all make mistakes sometimes and so we all see these messages; the key is to make constructive use of them.
Proofs in non-classical logics
The proof editor is not limited to the system of natural deduction proofs just for orthodox "classical" logic. It can also deal with proofs in constructive (intuitionistic) logic and in the substructural logics R and F* discussed in Chapter 8 of the Logic Notes, and in their common core C, which lacks both contraction and weakening.
The substructural logics require the assumptions on the left of each line to form a "bunch" rather than just a set; this introduces some complications into the operation of the proof editor. As detailed in the Notes, bunches are represented using the comma (,) and the semicolon (;) as operators to combine sub-bunches, rather than as simple comma-separated lists. One effect of this is that in order to specify a sequent to be proved, it is necessary to detail the bunch of assumptions to appear on line Z (the main goal) as well as listing them and specifying the goal formula. You must select the logic from the drop-down menu to the right before this can be done.
The proof editor is not as fine-grained and pedantic about the operation of structural rules as the official definition of proofs in R and F*. In the interests of shortening proofs, it applies the rule eW automatically, without your needing to mention it. The rules W and importation are run together into one rule called "contraction", and in R, as in classical and constructive logic, rules like RAA which discharge assumptions have contraction built in: they are allowed to discharge multiple occurrences of a formula in one step. Similarly, the rules K and exportation are combined into one rule called "weakening", and in F* this incorporates eK as well, though in R and C (which do not allow K or exportation) eK is made available as a separate rule. Multiple applications of eK, and of weakening where it is one of the rules, are allowed in a single step.